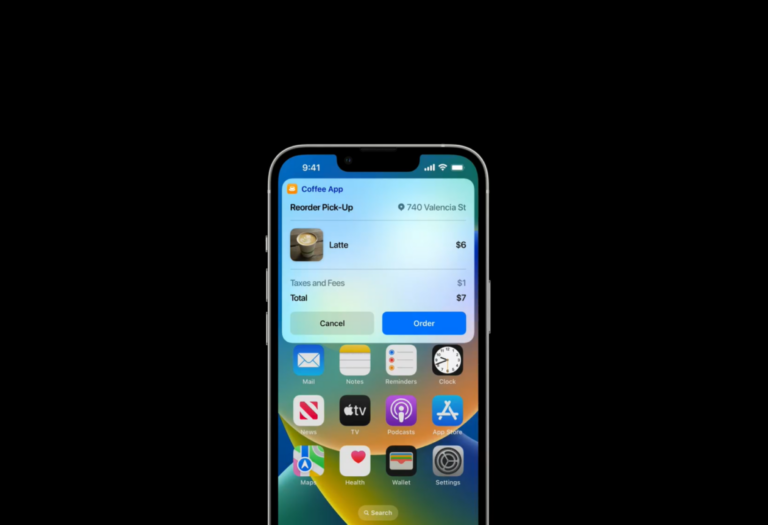
How save time with the new Swift Charts feature in Swift WWDC 2022 brought new updates to the community-beloved native language for the Apple environment. Swift is back with a lot of improvements and new capabilities to help developers deliver world-class apps with ease by enhancing swift charts for data. In this blog, we’re checking […]
Introducing WeatherKit for Your iOS Apps

Eibiel Sarjanto
July 6, 2022
4 Mins Read
Improving iOS user experience by considering weather conditions in WeatherKit
At WWDC 2022, Apple introduced the WeatherKit as a global scale hyperlocal forecast framework. It helps developers add valuable and accurate weather data to their apps and services on iOS 16, iPadOS 16, MacOS 13, tvOS 15, and watchOS 9. The framework is also accessible through the REST API for developers on any other platform.
The framework itself is powered by Apple’s Weather service, which offers up to the next 10 days of hourly forecasts for temperature, rain, wind, and more. Since it’s based on modern Swift syntax, developers can easily request weather data with just a few familiar lines of code. The best thing for users is that WeatherKit does not compromise user data and privacy since location information is only used for getting weather data.
How can we use the WeatherKit framework in our iOS app? Let’s get started!
Note: In this guide, I’m using the beta version of XCode 14.0.
Adding WeatherKit to your iOS app
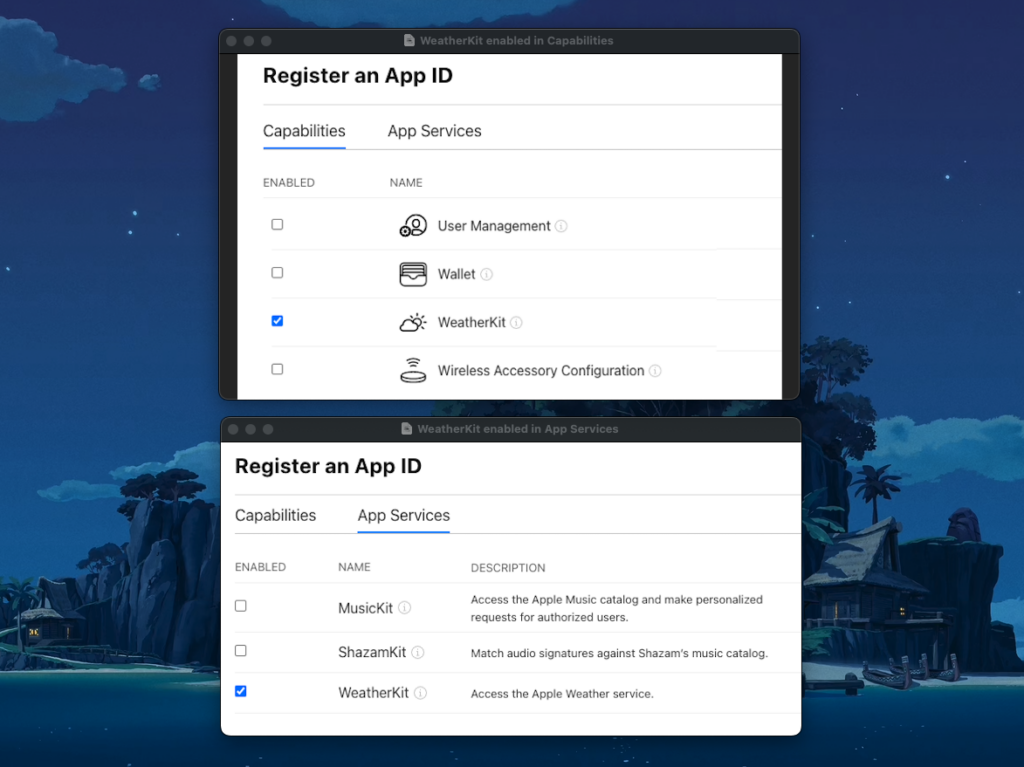
Firstly, we need to add WeatherKit capabilities to our app. Log in to an apple developer portal (or create an account if you haven’t) and go to Certificates, Identifier, then Profiles. Then select the Identifier tab on the left and add a new app ID. Enter an explicit bundle ID for your app and make sure that WeatherKit is enabled BOTH in the Capabilities and the App Services tabs.
Keep in mind that it takes 30 minutes to register your app ID with WeatherKit.
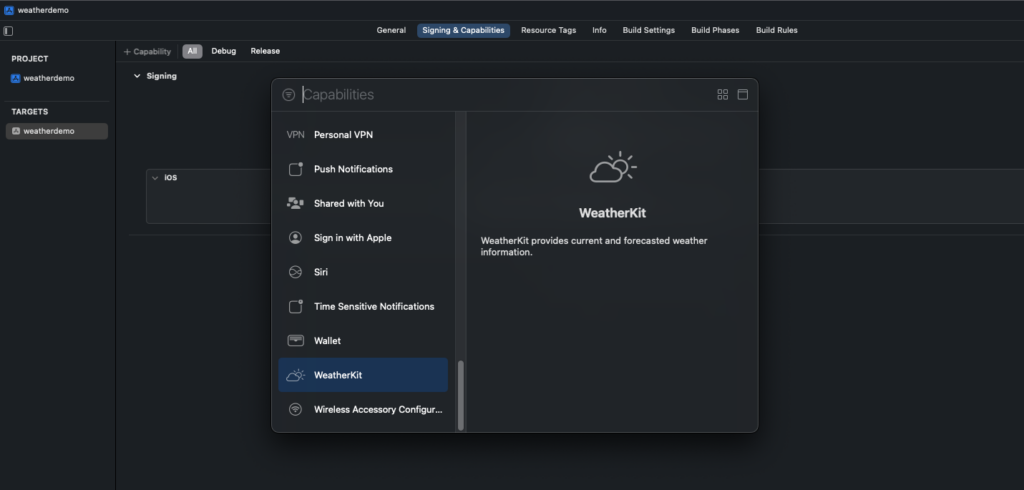
Next, let’s start a new project in Xcode. Create a new iOS app and make sure that your app uses the same bundle ID you registered in the developer portal. Don’t forget to add WeatherKit capabilities in your app.
Now our app is ready to use the WeatherKit framework!
Preparing a basic view for weather data for WeatherKit
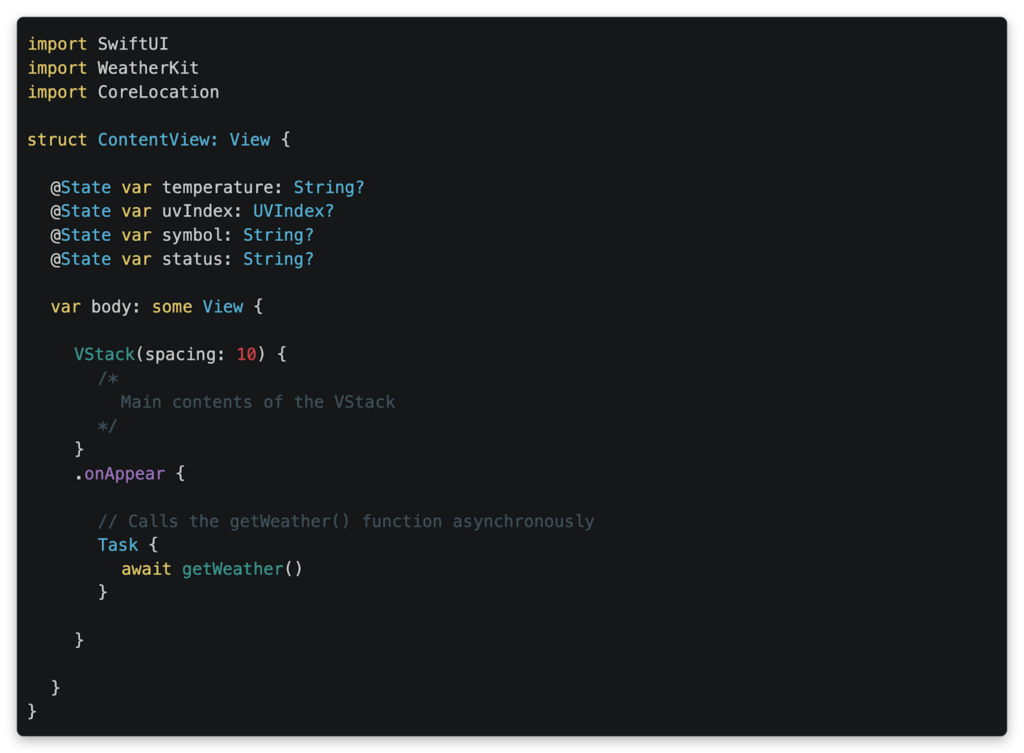
For this guide, we’ll create a view to show some basic info on the current weather in Jakarta.

The code above creates a view with some text to show the current weather status, temperature, and UV index, as well as an image to show the symbol for weather status. If you run the code now, there won’t be any information to show since we haven’t requested the weather data yet. So let’s make a function to get the current weather data in an extension for `ContentView`
The `getWeather()` function simply uses the `WeatherService()` instance to request the current weather data at Jakarta, just by passing the location coordinate. All the valuable data for Jakarta’s weather is stored in `weather` and is ready for us to use in our app. To see what’s available for weather data, check out the documentation (https://developer.apple.com/documentation/weatherkit/weather)
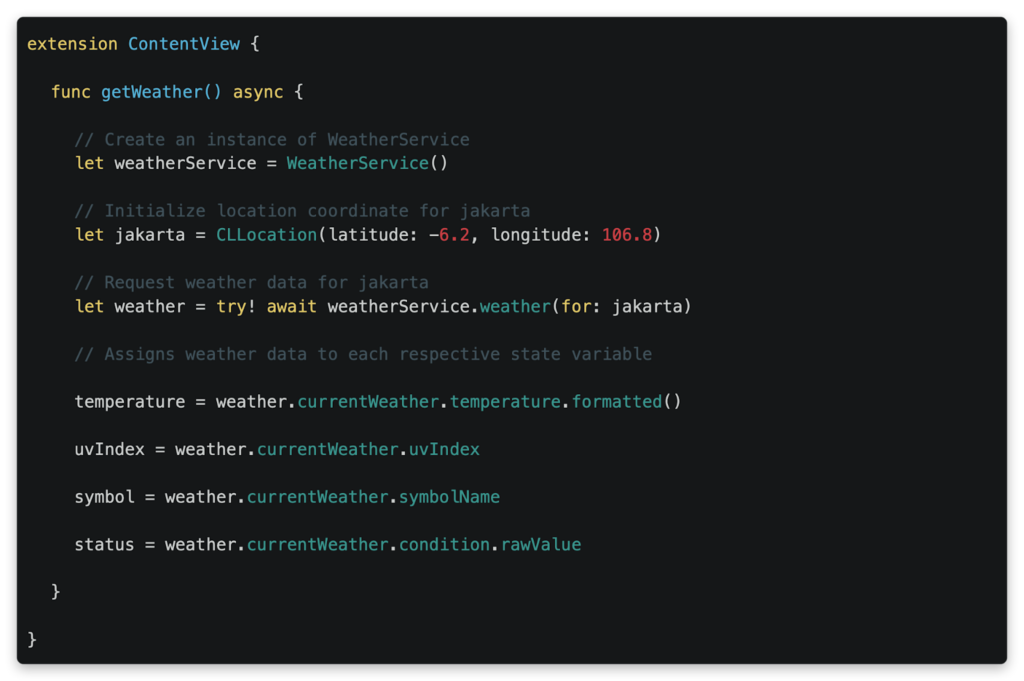
Now, let’s not forget to call this function when the view appears, by simply adding the `onAppear()` modifier to our `VStack`

Now run the code again and voilà! We got the basic information about the current weather in Jakarta! Since the framework is built on swift `Foundation`, you can easily format any measurement value with native swift syntax. For example, here’s how to convert the temperature to celsius:


You can check the full sample code project here
What’s next?
As you can see, WeatherKit is easy to use for anyone who’s familiar with modern Swift. While this example shows basic usage of the framework, it certainly has so many more capabilities to explore. You can also try it on another platform with the REST API provided by Apple. Till next time!
References
Written by
Eibiel Sarjanto
More Articles
Eibiel Sarjanto
July 12, 2022
4 Mins Read